This is default featured slide 2 title

Go to Blogger edit html and find these sentences.Now replace these sentences with your own descriptions.

This is default featured slide 3 title

Go to Blogger edit html and find these sentences.Now replace these sentences with your own descriptions.

This is default featured slide 4 title

Go to Blogger edit html and find these sentences.Now replace these sentences with your own descriptions.

This is default featured slide 5 title

Go to Blogger edit html and find these sentences.Now replace these sentences with your own descriptions.

Monday, July 29, 2013

Guide On Prawning

Prawn fishing, a.k.a Prawning, has been gaining its popularity amongst many recreational activities in Singapore over the years. Many of you might might have tried prawning but end up catching only 5 prawns or even going home empty-handed. Read on to see how you can improve your catch rate the next time you go prawning!


If you enjoy prawning and would like to get your own rod, here are a few pointers on choosing a rod.


The Action of the Rod
The action of the rod refers to the speed with which the rod returns to its neutral position.For prawning, you would want to get a rod which is very sensitive at the tip so you can easily feel when a prawn is biting. It is also more thrilling to catch prawns on a sensitive rod as you'll get to feel a better prawn 'fight'. 
The Length of Rod
A longer rod lets you to reach the further parts of the pond without much difficulties, allowing you to cover more area of the pond. If you like to target areas which are near to you, like around the side of the walls, then a shorter length rod might be a better choice for you. 
Types of Bait
Choosing the right bait for prawning is very subjective to the pond you visit and also somewhat of a personal preference. Some may say that raw cockles work best, while others say that earthworms are the best baits. I myself have caught a decent amount of prawns on chicken liver that are provided free at the pond I frequent. The only thing you need to be aware about your baits is that you should never use baits that are too big. As prawns nibble on food, a bait which is too big will not ensure the prawn to be nibbling head-on at the tip of your hook. It might just be nibbling at the sides of the hook. Each time you pull your line in, check and re-adjust your bait so that it sits at the tip of your hook, as a bait that is too far into the hook will not get you any catch. Change your bait when it looks distasteful and dull, remember that fresh bait will attract the prawns! 
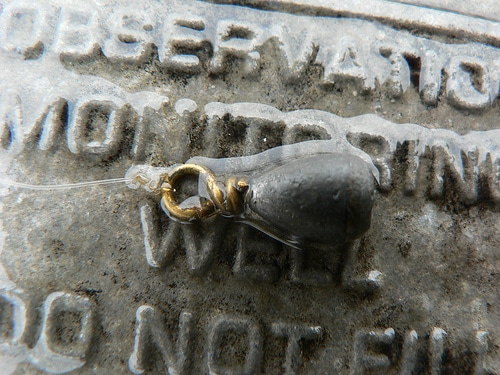
Measuring the Depth of the Pond
Before you get all excited and starting baiting up your hooks, you must first measure the depth of the pond that you are prawning in. Not all ponds are of the same depth and there might be uneven surfaces in the same pond. Attach a small weight to your hook and let it sink into the pond carefully, ensuring the weight does not get detached from the hook. You'll be able to feel the weight touching the floor at the bottom of the pond. Now, take note how far your float is to the surface of the water. Adjust your float higher or lower accordingly, until the tip of your float touches the water surface when the weight sits on the floor at the bottom of the pond. The reason why you need to measure the depth of the pond is because most prawns are bottom feeders, with occasional 'hero' prawns swimming up to the surface to taunt you. Measuring the depth of the pond will ensure that your line is of the correct length and therefore be sensitive when a prawn bites. 
Size of Hook
Big or small hooks?Bigger sized hooks are easier to remove from the prawn if you catch one as you have more grip on the hook compared to a smaller one. While bigger sized hooks are easier to remove from the prawn, using a smaller sized hook also proved to provide a decent catch rate.Most importantly, you need to attach new hooks once in awhile as the tip tend to become blunt after piercing through many prawns. Always ensure your hook-tips are sharp! 
When to Strike
Now comes the part which require some skill and practice. Every time I go prawning, I see people striking right after they see their float sink, or slowly lifting up their rod until their float gets pulled out of the water before striking. These techniques are wrong and it might be the reason why you are going home empty handed.When you see your float sinking down a little, always wait for a few seconds to let the prawn enjoy the bait for a while. After which, you move your rod tip until it is perpendicular to your float. Slowly, lift up your rod until your line is tensioned, but not to the point your float starts to get lifted up, as that might scare the prawn away. Now, flick your wrist hard. (NOT YOUR HAND!) I've seen many people lifting their entire arm up when striking. Just a flick of your wrist will be enough to set the hook into the prawn. If there is no prawn at the end of your line when you flick, simply flick your line back into the water so as not to injure other prawn fishers or get your line all tangled up.


I hope that you've gained some essential knowledge after reading this article. 
Please share this page with your friends so that they'll know the proper way to prawning as well:)
Have fun prawning! 


10 Basic Items You Should Pack In Your Tackle Box

Summer is almost here and that means it’s fishing time. Fishing is a fantastic, manly pastime. It’s a great way to relax and catch up with old buds or quiet your mind after a rough week of work. But before you head out to the old fishing hole, you need to have a well-stocked fishing tackle box. Like the contents of a man’s tool box , the contents of a man’s tackle box often comes down to personal preference. The contents will also change depending on the type of fish you’re angling to catch. But every fishing tackle box should have a few basic items. I went to the Bass Pro Shop in Broken Arrow, Oklahoma to ask a few old timers for their opinion on what they thought should be in every man’s tackle box.
The following are the 10 things we came up with that every man’s fishing tackle box should contain:

1. Extra line

fishline
Whether it’s because you get a bite from the legendary monster fish that lurks in the depths of the old fishing hole or you just get your line caught on a log, it’s almost guaranteed that your fishing line will break or get tangled up during a fishing trip. Thus, it’s always good to have some extra line in your tackle box. The line you carry depends a great deal on where you’re fishing and what kind of fish you’re fishing for. If you’re fishing in rough conditions, you’ll want a heavier and more durable fishing line. This should help reduce the chances of snappage. If you’re fishing in a crystal clear lake, stealth is the key. So choose a thin, clear line to fake out the fish.

2. Extra hooks

fishhook
Stock your tackle box with a variety of hooks so you’re ready for any sort of fish. I like to stick with the traditional J-hook, but many fishermen swear by the french hook. No matter what type of hook you carry, make sure you have them in different sizes. You don’t want to fish for river trout using a hook that’s sized for a 120-pound catfish. Sizes range from the very smallest at a number 32, to the very largest at 19/0.

3. Bobbers

11306t
Bobbers, or floaters as they’re sometimes called, help you know when you’re getting bites from a fish. When a fish bites, the bobber sinks. As soon as that happens, you know you’re ready to reel your catch in. Again, you have some choices when it comes to bobbers. The bobbers most people are familiar with are the round red and white plastic ones. The round bobbers are nice because you just have to clip them to the line in order to attach them. However, the round bobber does limit how deep you can cast a line.
Enter the slip bobber. A slip bobber lets you slide it up and down the line. Slip bobbers take a bit more time to rig, but many fishermen think the extra effort is worth it because you get your hook into deeper water.
You can always go old school style and use a piece of cork with a stick in it. Just tie one to your line and you’re good to go.
Further reading: How to Attach a Slip Bobber

4. Sinkers

sinker
A hook and worm alone are too light to sink very deeply. You’ll need to attach a weight or “sinker” to your fishing rig in order to compensate for that. I’ve lost plenty of sinkers on fishing expeditions so it’s good to have some extras on hand. Sinkers are traditionally made of lead, but some states are beginning to outlaw the use of lead sinkers for environmental reasons. It wouldn’t surprise me if the this trend continues. Other options for sinker materials are brass, tungsten, steel, and bismuth.

5. Plastic worms

plasticworm
While I’m a big fan of using live bait, it’s always good to have a package of plastic worms in your tackle box, especially if you’re bass fishing. Plastic worms come in a variety of colors and sizes. The worms with the long tails are probably the easiest to use. Some fishermen swear that certain colors of plastic worms will increase the number of bites. It’s probably a superstitious belief, but if you’ve had luck with a certain color plastic worm, you might as well keep using it.

6. A couple of lures

lures
The old hook and worm should be enough for most of your fishing needs. But sometimes you’ll want to bust out some of the more complex lures in order to up your game. There are literally hundreds of types of fishing lures to choose from: spinners and spoons, minnow imitations, and top water lures to name a few. Each type of lure is designed to behave a certain way in the water in order to attract fish. For example, the minnow imitations are lures that look like small swimming minnows. Many medium- and large-sized fish like to munch on minnows, so it can be an effective lure. Spinners have a blade attached to them that creates a spinning action to attract fish. The type of lure you use is a matter of personal preference. Experiment to find what works for you and keep a few extra in your tackle box.

7. Needle nose pliers

pliers.jpg
Needle nose pliers are needed for taking the hooks out of the fish after you catch them. They’re also sometimes needed to take the hooks out of you.

8. Small first aid kit

firstaidkit
Hopefully you won’t have any major medical emergencies while you’re fishing. But small injuries are likely to happen, like getting a hook caught in your thumb or falling down and getting scraped up. For these sorts of things, it’s good to have a small first aid kit on hand. It doesn’t have to be fancy. Just throw in some band-aids, Neosporin, a few small bandages, and some waterproof medical tape. That should take care of most fishing-related injuries.

9. Sunscreen

sunscreen
When you’re fishing, you’re going to be out in the sun all day. In order to keep your face from looking like an old catcher’s mitt and to prevent skin cancer, slather on some sunscreen. Face it. You’ll probably forget putting it on before you leave the house. Just keep it in your tackle box, so when you open it up, you’ll be reminded to put it on.

10. Line cutter (nail clippers or knife)

RCRW_DL-HH-05_Clippers

Sometimes you’ll get a snag that you can’t get out of and your only option is to cut the line. While a pocket knife can get the job done, one trick that an old timer at Bass Pro Shop shared with me is using nail clippers to cut your line. It’s quicker and more efficient than using a knife.
Now it’s your turn. What do you think should be in every tackle box? Did we leave anything out in our list? Drop a line in the comment box.